


Bread Tins (uncoated)
Price range: £14.95 through £15.95
Bread Tins – now uncoated = no PFAS in our bread!
March 2025
We, like others, have become increasingly concerned about the prevalence of chemicals known as PFAS (perfluoroalkyl and polyfluoroalkyl substances) in the environment and, it seems, in our bodies. Some of these chemicals such as PFOA (Perfluorooctanoic acid) and PFOS (perfluorooctane sulfonate) are implicated in human cancers. Our bread tins were, until now, treated with a non-stick coating that we believed (on the evidence at the time) did not contain these harmful substances. Now we can’t be sure – and anyway, it can’t be denied that non-stick coatings degrade over time and have to go somewhere. If ‘somewhere’ includes our bread, that’s a risk that no longer justifies the undoubted convenience of not having to grease our tins.
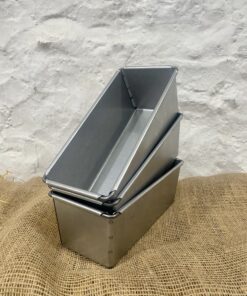
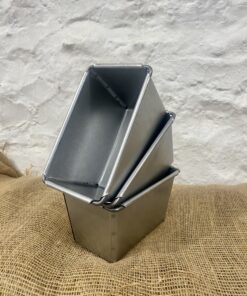
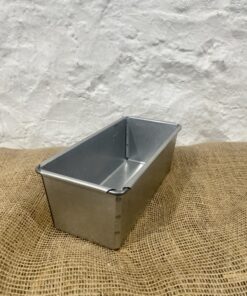
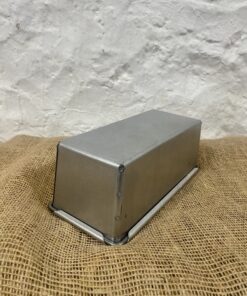
Our new supply of uncoated baking tins are exactly the same shape, size and construction, as before – just not treated with anything. They are made by the same Yorkshire firm that supplied thousands of tins to Andrew Whitley’s Village Bakery from 1976 onwards. They are of professional quality, robustly constructed from 0.8mm thick aluminised steel which isn’t just strong enough to last a lifetime but also transmits heat evenly with no hot spots.
You may notice some superficial scratches here and there. These are, the manufacturer says, an unavoidable consequence of the way that the sheet metal is folded and shaped. They won’t affect the appearance of your loaves.
The profile of our tins (narrow and tall) is helpful to real bread bakers using flours chosen as much for their flavour and nutritional value as for mere ‘strength’, i.e. their protein (and therefore gluten) content. UK-grown wheats, heritage varieties and older precursors of common wheat such as spelt, emmer and einkorn often have less stretchy gluten in them. Indeed, this is one of their attractions to people who have trouble digesting modern wheat. But lower – or simply different – protein content can translate into a loaf with a weak internal structure (that’s jargon for ‘ends up as a pile of crumbs when you cut it’).
Home bakers experimenting with interesting flours, perhaps from a local farmer or miller, may be disappointed when their beautiful-tasting loaf has a hole under the crust. Often, the main culprit is not the skill of the baker, nor the quality of the grain but the shape of the tin: fragile doughs may not be able to ‘bridge’ a wide shallow tin, and even when they do, the resulting loaf never looks anything like what you ‘can get from the shops’. [Don’t get too hung up on trying to emulate commercial bakers’ loaves, though: chances are they are full of dubious additives designed to puff dough up to prodigious heights without bothering too much about what they do to your digestive system.] So, with less width to bridge, weaker doughs hold together better – and the loaf produces nicely shaped slices that will fit in any toaster.
As a rough guide, these tins will take the following amounts of various types of dough (bearing in mind that the more refined flour you use, the higher the loaf will rise):
Small tins
Plain wheat dough – 450-550 grams
Sourdough rye dough – 650 grams
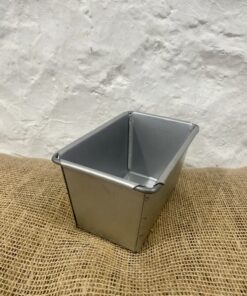
The small tin is produced using a unique mould made specially for Scotland The Bread and with its high sides produces a very attractive, artisanal loaf.
Large tins
Plain wheat dough – 850-950 grams
Sourdough rye dough – 1100 grams
For tin dimensions, please click on Additional Information at the top of the product description.
Use and care of uncoated baking tins
Before using the tin for the first time, please wash it in warm water to remove any residual dust or dirt from the manufacturing process. Don’t use washing-up liquid or other detergent. Dry the tin completely.
Optional: grease the tin lightly with a fat that is hard at room temperature, e.g. butter, coconut fat, lard. (Liquid oil tends to run down the sides into the bottom of the tin too readily.) Put the tin (without any dough in it) in the oven for about 15 minutes at 180°C. Remove and allow to cool. This begins to ‘burn on’ a thin coating of natural material that ‘conditions’ the new tin before you bake anything in it.
Regular use
With plain doughs (i.e. doughs with no added enrichment of sugar, egg, fruits, vegetables etc), grease your tin with a thin layer of butter, lard etc. before placing the dough in the tin to rise.
For richer and stickier doughs, use a bit more fat (at least when the tin is fairly new) and then dust the inside of the tin with flour (the bran in wholemeal flour is a particularly good ‘release agent’).
Never use a metal knife or other hard implement to help reluctant loaves out of the tin. If they don’t slide out easily, tap the side of the tin with your (oven-gloved) hand or on a pad (e.g. a folded tea towel) on the table. If this doesn’t work, leave the loaves for a few minutes to ‘sweat’: the residual steam coming out of the loaf will condense on the inside surfaces of the tin and often has the effect of dissolving any sticking points.
| Weight | N/A |
|---|---|
| Dimensions | 10 × 16 cm |
| Baking tin sizes | Large bread tin, Small bread tin |
| Small bread tin dimensions | Top inside – 159 x 95 mm; Bottom outside – 136 x 76 mm; Depth – 95 mm |
| Large bread tin dimensions | Top inside – 237 x 102 mm; Bottom outside – 220 x 90 mm; Depth – 90 mm |
Related products
Special Patterns

Bread Domes